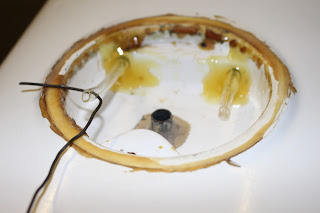
Still to be done in this boat repair project are cementing those rudder-line tubes in place and doing something about that hole I cut in the boat. For these jobs I will be delving into the world of fiber-reinforced plastics (FRP).
I do not for a minute claim to be a great expert in FRP. I know a number of people who are experts, or at least highly-accomplished amateurs; the ones I can think of off the top of my head include John Kazimierczyk in New Hampshire, Bill Hearn in Massachusetts, Doug Bushnell in New York, John Brennan in Colorado, and Brad Rex in Louisiana. Every time I have a problem with a boat I wish I had one of these people around to hold my hand while I fix it. But I don't, and as a result I'm a veteran of years of trial and error and I've managed to learn a thing or two in the process. And frankly, I believe that any canoe and kayak racer worth his salt has at least a modicum of skill in FRP repair. As I mentioned in a previous post, our sport doesn't have the abundance of tech support personnel that sports like golf and tennis and bike racing and auto racing have, so if there's a problem with your boat you should be ready to fix it yourself.
The first thing I did was affix the rudder-line tubes to the inside of the hull amidships so they won't just be flopping around freely in there. The boat actually does have existing eyelets that the old tubing passed through, but my new British-unit-sized tubing is a hair bigger than the old metric-unit-sized tubing, and it doesn't fit through them. Also, I can't reach most of these existing eyelets from the hole I cut. So I had to do something else. For this job, I used this product:
The two-part West System epoxy resin and hardener can be purchased from various retailers; I get mine from Sweet Composites, owned by my old slalom-racing friends Jennifer and Davey Hearn. The yellow pumps are calibrated to dispense the resin and hardener in the correct ratio. The plastic tub contains fine wood dust saved from my electric sanding tools (for those who don't know, I build wood furniture in my out-of-the-boat life). Fine wood dust makes a good thickener.
I mixed up the resin and hardener in the clear plastic cup. Then I added it to a pile of wood dust in the black jar lid. I added wood dust a little at a time until I had a paste with a consistency similar to peanut butter:
I then used little globs of this paste to glue the tubing to the inside of the boat in as many places as I could reach. This is about the best camera angle I could get:
The spring clamps are there to hold the tubing flat against the hull surface. I should note that I had sanded the hull surface ahead of time so the epoxy paste would form a good mechanical bond with it. Epoxy is unlikely to bond with the smooth glossy plastic of the tubing, so I tried to pile the paste up and over the tubing to create a crude "eyelet" that the tubing passes through.
Once the paste had had a few hours to get good and hard, I turned my attention to the ends of the tubes where they poke out of the boat at the stern and in the cockpit. To secure the tubes in these spots, I turned to another West System product (also available from Sweet Composites):
G-flex epoxy is supposed to better than traditional epoxy at sticking to common consumer-grade plastics like that of the tubing, and it's good for bonding dissimilar materials, so my hope is that it will keep the ends of the tubes where they belong. Hoping to create the best possible bond, I roughed up the tubing surface by sanding it lightly with coarse paper. Then I mixed up some G-flex and applied it where the tubing emerges in the cockpit:
...and where it emerges at the stern:
In both places, I'd pulled the tubing taut ahead of time. You can see the postal tape I used to keep it in place in the cockpit; at the stern, the left-hand tube was wanting to slide back into the boat, so I used the piece of wire to hold it where I wanted it. (Yes, the excess tubing will get trimmed off later.)
Coming up next: I'll do something about that hole I had to cut in the boat.


No comments:
Post a Comment